If you’re concerned that your Contact Us form entries are getting lost and/or ending up in Spam, I can give you a direct way to see all the Contact Us entries that were submitted.
If you have a domain already, I prefer to transfer that into my hosting account for simplicity and reliability (plus I then handle the renewal fee for you). If you’re concerned about transferring the domain to me, if you hate me in 3 months, I will transfer it back to you … I have no interest in becoming a plumber, electrician, landscaper, etc. I like things simple, and splitting domain/hosting/email across two accounts, where I have to rely on someone to make technical changes in their account almost always never goes well.
Your plan will either include email forwarders or hosted email.
Email forwarders – let’s say your new website is called example.com. We can create a forwarder named info@example.com. All email sent to that forwarder info@example.com simply is forwarded to your existing Gmail/Hotmail/other email address that you already use today. You can choose “info@”, your first name, or most any other name for the email forwarder. You can never send email from the forwarded account, info@example.com. You will always reply to emails using your Gmail/Hotmail/other account.
Hosted email – this is a full email account. It can fully send, receive, and store emails. Some people believe this looks more professional, and also helps to keep your personal email separate from your business email. Hosted email is only included with our Deluxe and Commerce plans.
You cannot have a mix of some forwarded email addresses, and some hosted email addresses. The numbers listed on Pricing and Plans are the maximum of each, but one account cannot support a mix of forwarding emails and hosting emails.
The topic of email can be a little confusing. The phrase “fake it ‘til you make it” whereby people guess at things can really do harm if you go too far down the wrong path, All the work required to set up email is best spent getting the user exactly what they want, otherwise we have to unravel and rebuild the correct email solution that the user truly needs. I previously taught part-time at the university level, and I love teaching and explaining technology. If the email options don’t make sense, I’d be happy to cover them in great detail with you to help you make the best choice.
You should have your new email address, a password, and the link to click for logging in using your email / password via a web browser. This link is the web portal for your email account. You can fully send and emails using only a browser. Please do change the password to something that is more meaningful to you, this is your account and you should customize it as you see fit.
You MUST first login to your account using a web browser to set it up.
If you later prefer a native mobile app for email access on your hand held device AFTER logging in via a web browser, search for “Outlook” at Apple App Store or Google Play.
If you are using a phone app and ever change your phone, you should revisit the steps of logging into your account using a web browser on a desktop or laptop.
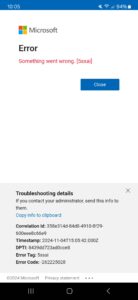
If you see the following error message on your phone, use a computer and login to your account. Then AFTER logging in via a web browser retry the native Outlook app.